These last several years have been difficult emotionally and mentally as I’ve struggled to find that palpable connection with nature which I’ve been accustomed to for much of my life. It has felt as though a significant part of who I am, was stripped away as my brain functioned in different way. Earlier this year, I decided to make a habit of going outside, regardless of whether it triggered that emotional reaction or not. Throughout the summer, I was able to find joy again in the little moments and feelings that they presented. Camping in the forest and being near water created opportunities to once again, connect with nature in a way I hadn’t often experienced since the end of 2020.
During September on my walks during my break on workdays, I would suddenly experience a strong feeling and emotion would rush over me! These breakthroughs felt so monumental as the constant numbness that had persisted for more than 2 years, was abruptly broken, if only for a brief moment. Fall is always my favorite time to photograph nature with its stark contrasts and striking colors. Going to New England to experience their version had been at the top of my list since around 2008 and I was so excited to finally have the chance to travel to New Hampshire and Vermont with Katy!
My very first hike in the White Mountains took place in the afternoon on October 5th as I drove north on Hwy 302 through Crawford Notch as I made my way to the trailhead of Sugarloaf Mountain. The weather was calm and sunny with a thin layer of clouds off in the distance. In New England, the majority of trees are hardwoods which lead to a spectacular display of color if timed correctly. In western Oregon where I live, we have a majority of coniferous trees in our wild places with a few deciduous trees along with vine maples which turn a crimson red and golden yellow. As I crested the summit plateau of Middle Sugarloaf Mountain in the early evening, the granite shelf dropped away to reveal a sea of color that went on for many miles as the surrounding mountains put on a display of peak color that blew me away! This first image is one of my favorites as bright reds, greens, yellow and orange all swirled together and seemingly went on forever. I couldn’t have timed the peak color better for this location as just days earlier, it was mostly green and two days after this hike, a rainstorm would strip many of the leaves in the area.

Taken with Sony a7ii and Zeiss Batis 18mm f2.8

Taken with Sony a7ii and Sony 70-200mm f4
Another couple of favorite images from this hike included a couple that I took with my 70-200mm lens that I used to capture some closer details of the cluster of colors that appeared directly below the cliff’s edge. The first image below shows the brilliant display of color all together with a little bit of the granite cliff included. In the second image, I was able to capture a slice of sunlight that illuminated the hillside adorned in a scarlett red.

Taken with Sony a7ii and Sony 70-200mm f4

Taken with Sony a7ii and Sony 70-200mm f4

Mt. Washington in the middle of the frame taken with Sony a7ii and Sony 28mm f2
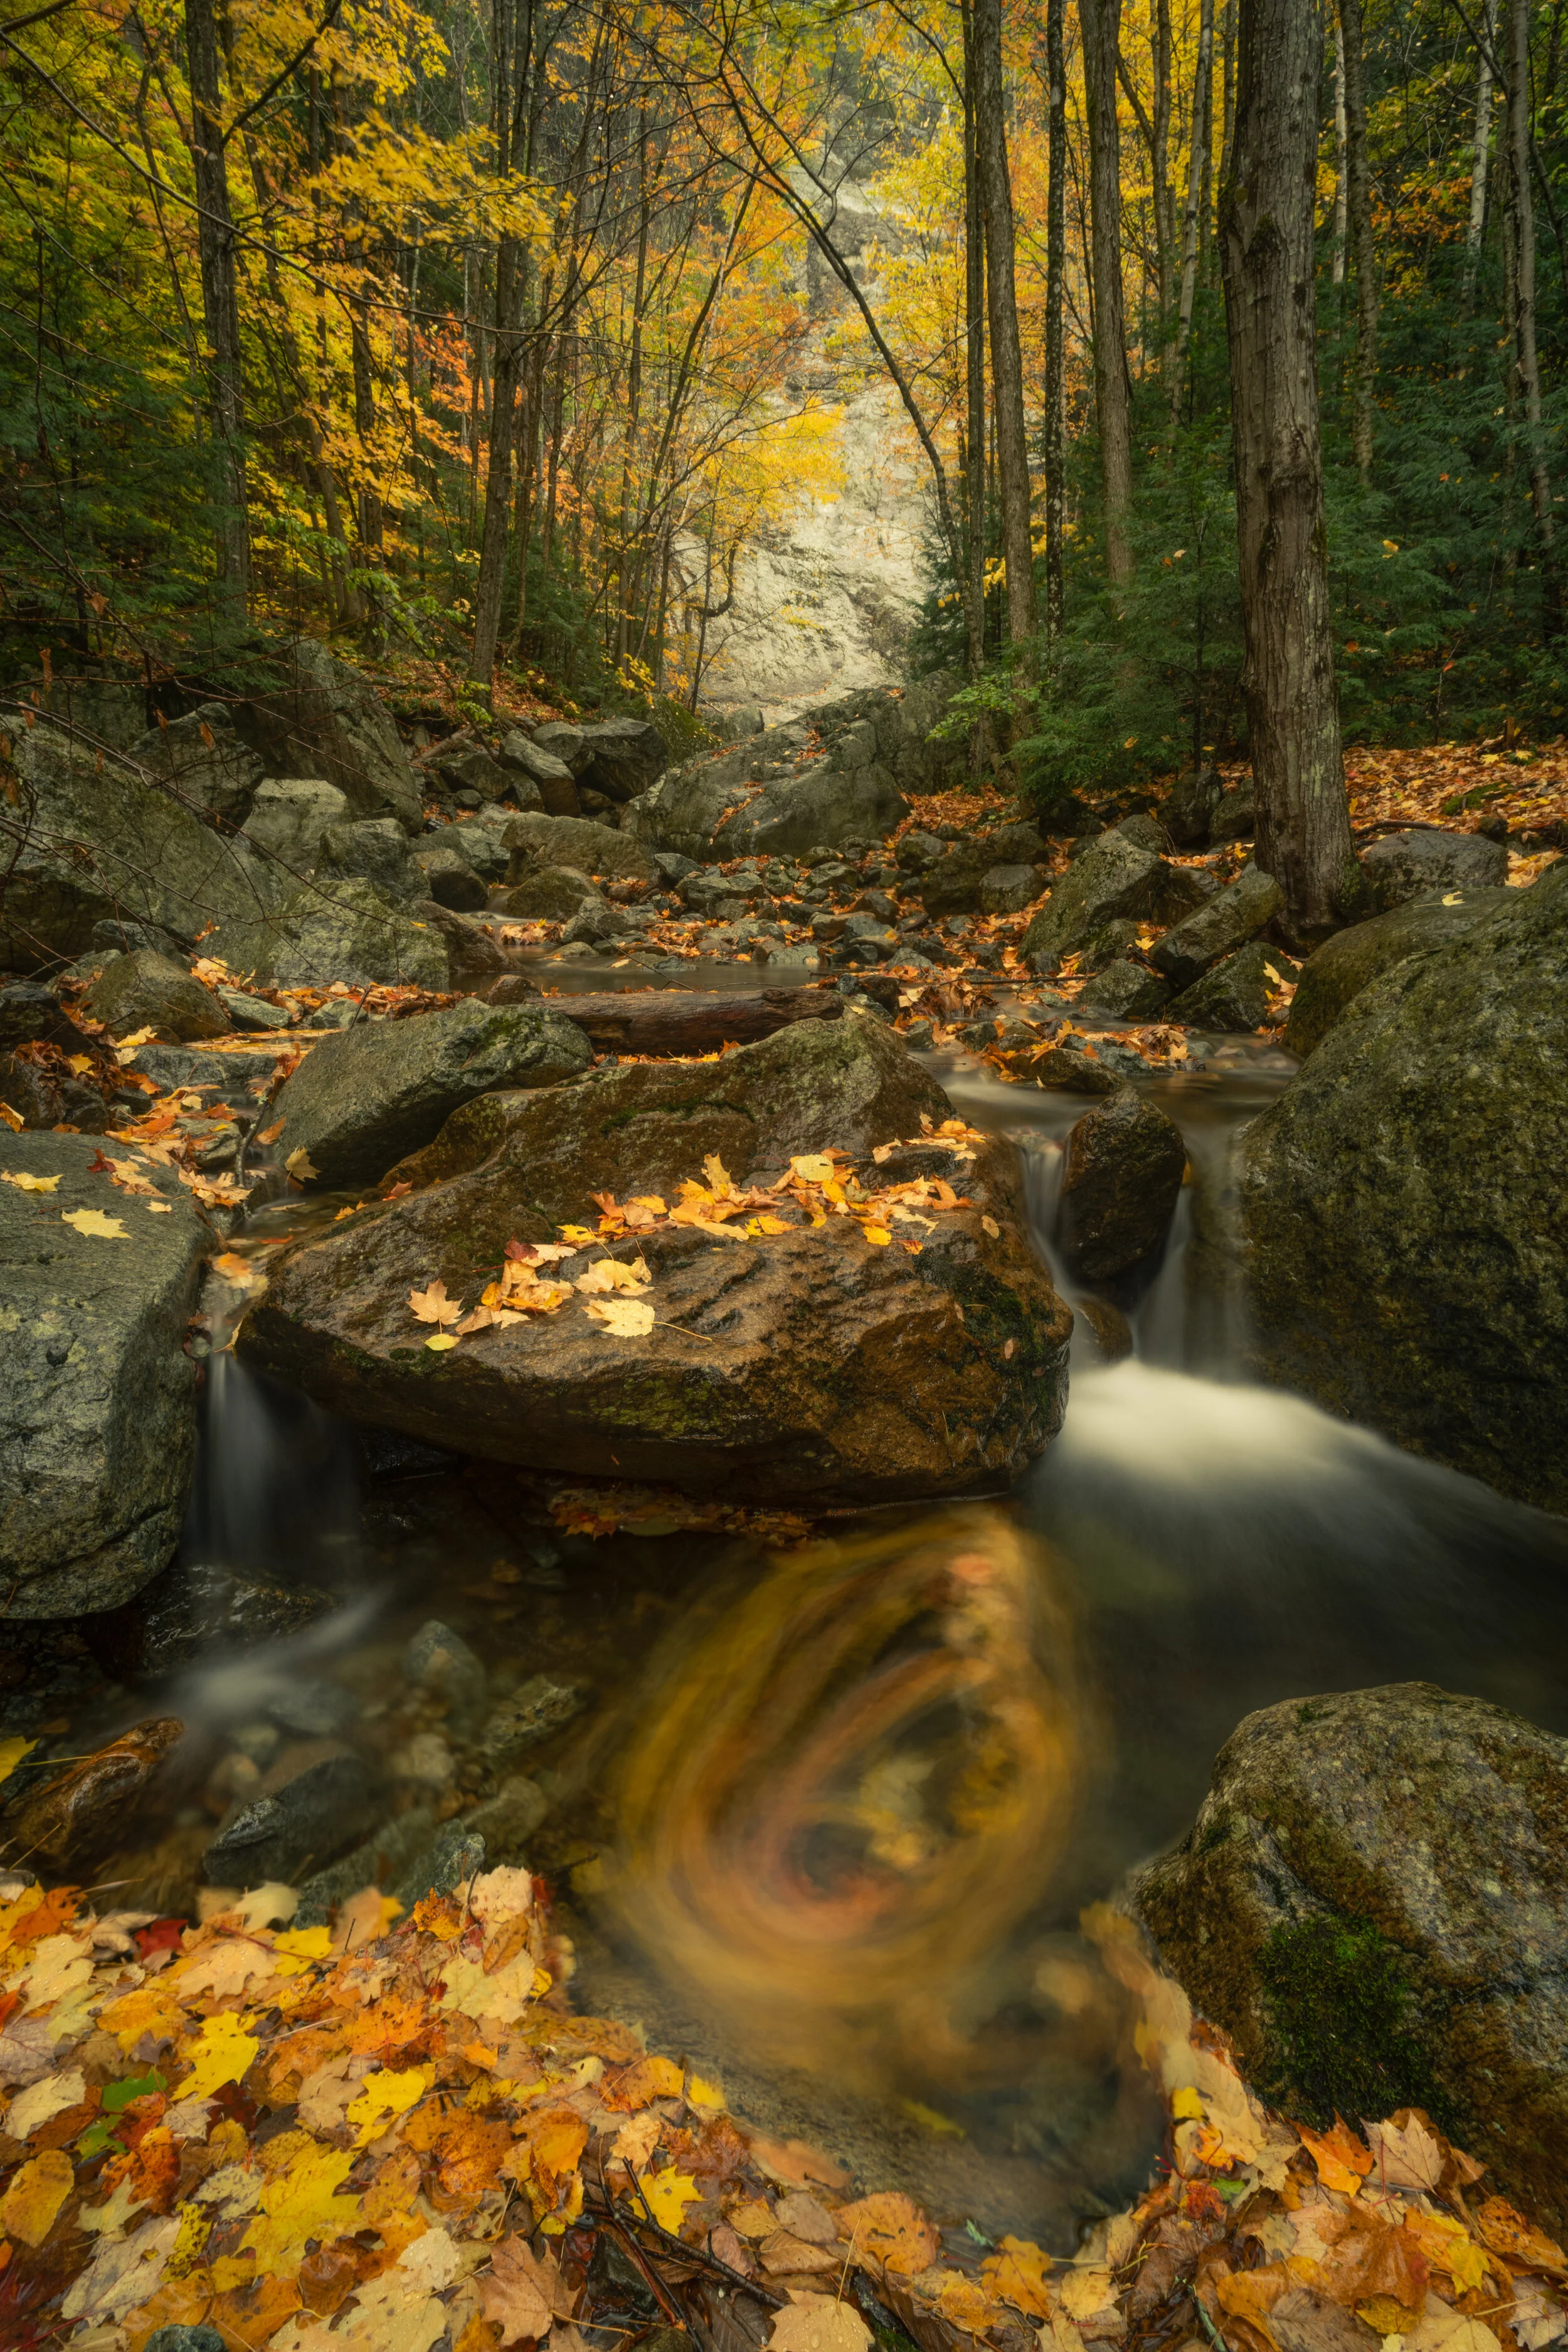
On October 6th, I again went north as I left early in the morning to hike Mt. Willard for a view of the famous Crawford Notch. Crawford Notch is an incredible swooping canyon with sloping granite walls on either side, filled in with mainly deciduous trees and some fir. The hike took me up the backside of the mountain at a casual but steady incline, through the colorful forest which paralleled a crystal clear creek in some areas. Once at the top, the view opens up to reveal an expansive scene which includes the road which I drove in on earlier in the day. A layer of thick clouds enshrouded the upper walls of the gorge as a brisk cold wind rushed up the face of the mountain. I had been hoping for some nice sunlight to light up the trees below, but it appeared that it might not happen this day. After waiting for an hour and a half, finally a break in the clouds allowed sunlight to spill across to the opposite side and bring out those rich colors below!

Taken with Sony a7ii and Zeiss Batis 18mm f2.8

Taken with Sony a7ii and Zeiss Batis 18mm f2.8

Taken with Sony a7ii and Zeiss Batis 18mm f2.8
After the heading back to North Conway to pick up Katy, we drove south to connect with the Kancamagus Highway which was full of beautiful color. Thankfully, the day we went wasn’t busy and we were able to enjoy our drive as we made our way west towards Lincoln, Hew Hampshire.
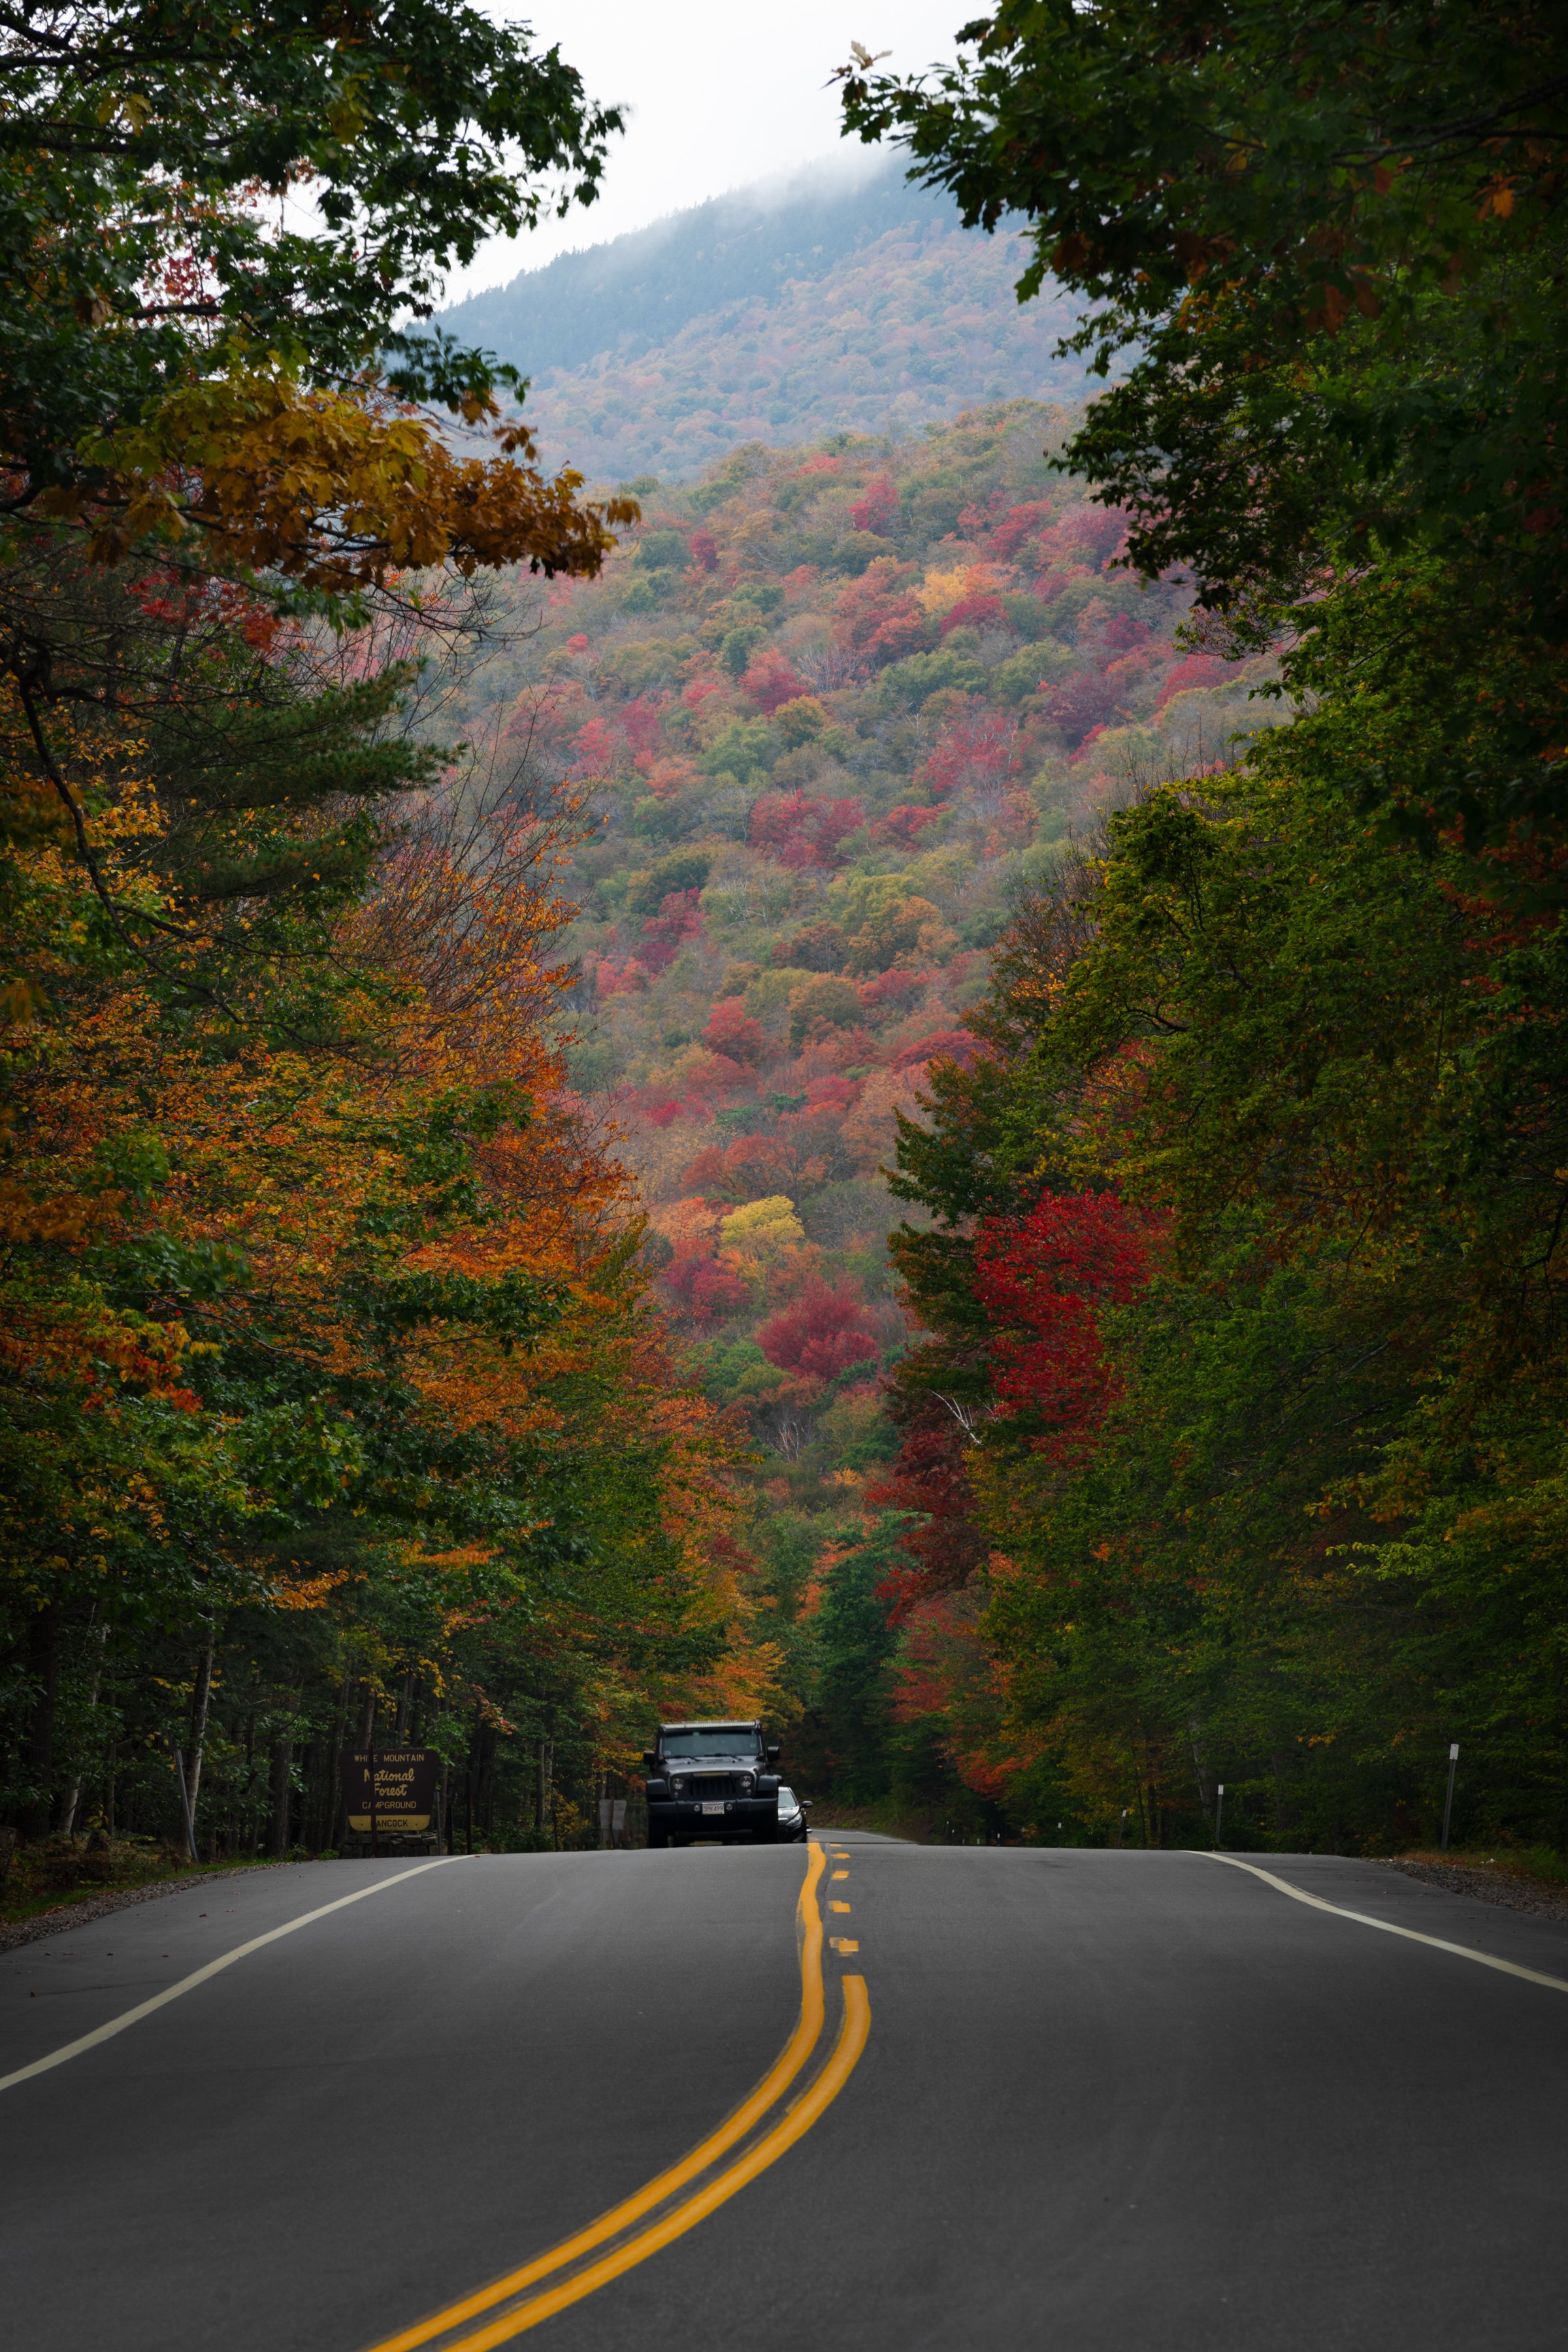
Taken with Sony a7ii and Sony 70-200 f4
After several days in New Hampshire, we made our way to Northeastern Vermont where we stayed on a beautiful property near the town of Danville. I loved traveling through both Vermont and New Hampshire as each state is small meaning destinations were often less than an hour away by car. Everywhere we went in Vermont was picturesque, full of rolling farmland and tree lined streets off the beaten path. Our host shared with us that the summer had been exceptionally wet, leading the grass to be a vibrant green in early October rather than the usual muted brownish color. It was stunning!

Taken with Sony a7ii and Zeiss Loxia 50mm f2

Taken with Sony a7ii and Sony 70-200mm f4
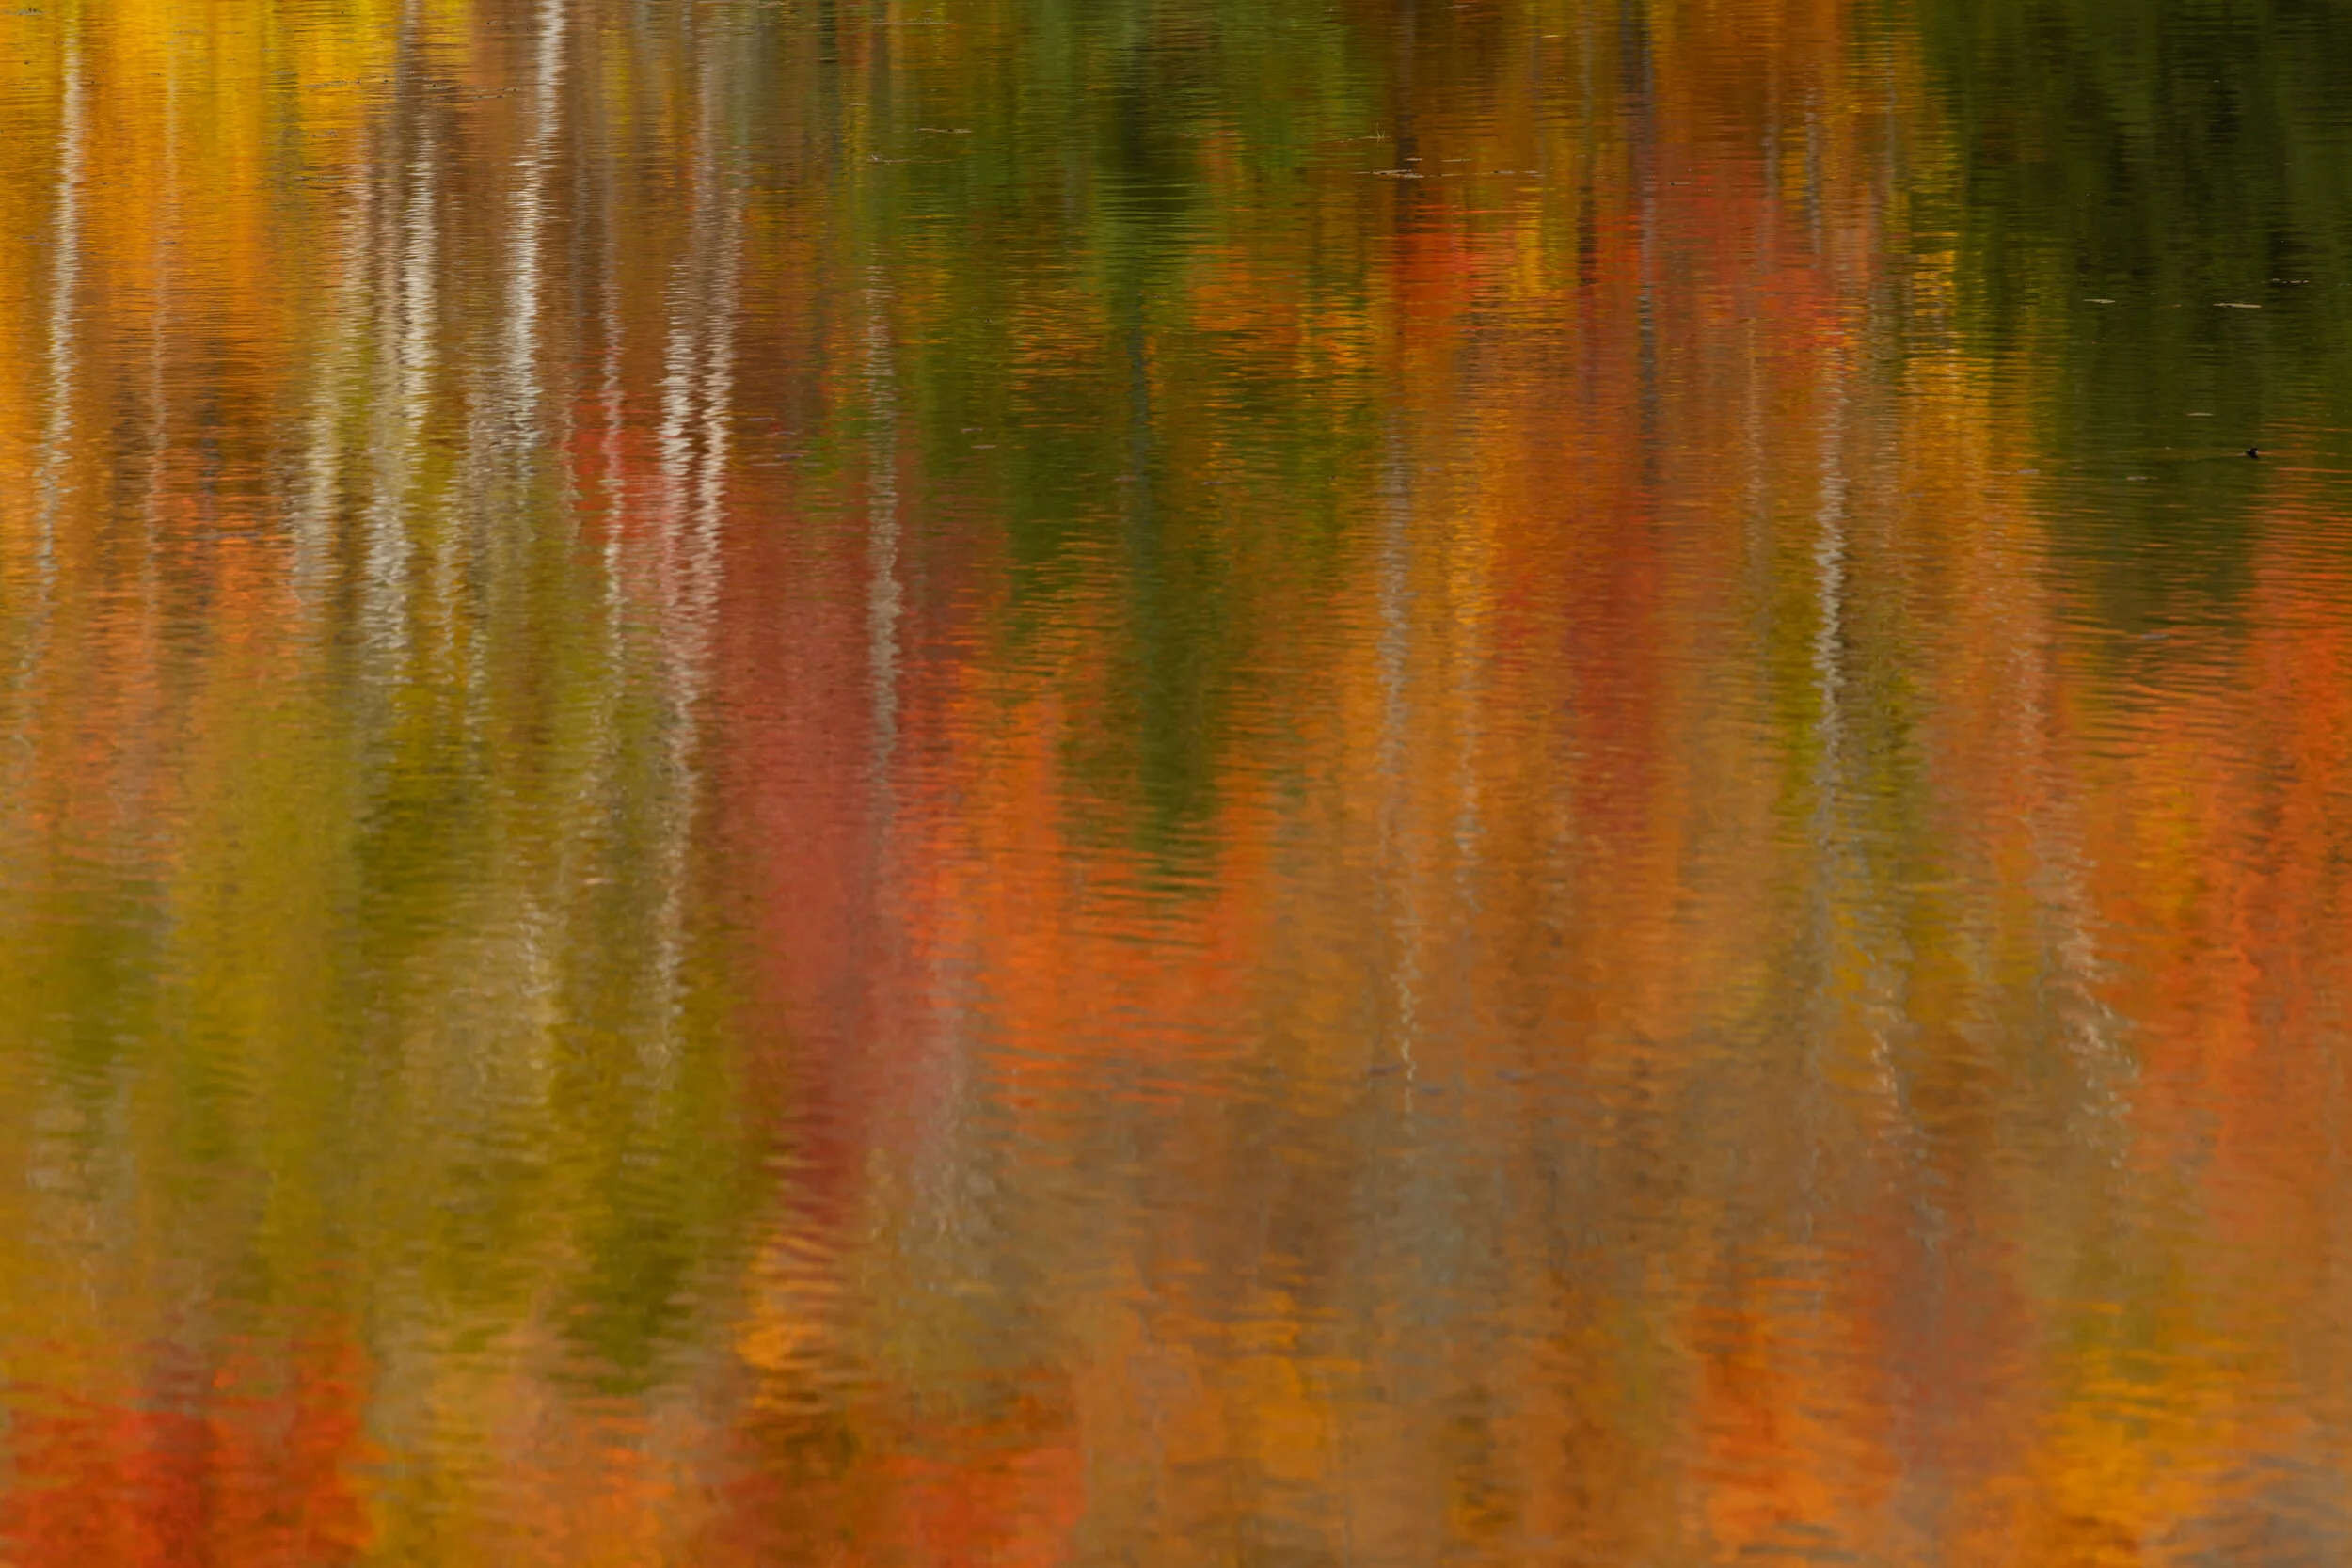
One of the hikes that I was interested in including a short climb to a viewpoint overlooking a beautiful lake and the surrounding area. Not being familiar with the area, I plugged in the trailhead into Google Maps and drove off in our rented Chevy Equinox. Soon enough, I turned left onto a single lane dirt road that was covered in leaves that had fallen from the recent storm that had dropped heavy rainfall. Following the directions on my phone, I soon discovered that this road would become treacherous to drive on as it gave way to boulder crawling at a steep angle on shelves of rock covered in slick leaves. The one other car I saw in the road decided to turn back, smartly. I pressed on which I would learn was a terrible mistake as the road became a sloshy mess with deep mud.
Finally, I reached a point where I could no longer continue due to a deep creek crossing which forced me to attempt to turn around. Before I knew it, I was completely stuck and digging out the mud with my hands, trying to free the car! Thankfully the car was somehow able to get moving as I learned that I would be driving backwards through the difficult path that I come in on. A couple who lived in the area was taking a walk and briefly spoke with me. ‘Are you looking for Nichol’s Ledge?’ The woman asked. I answered yes and shared that I had learned that driving in this way was a mistake in hindsight. She shared that the recent rain had made it impossible to pass through due the conditions and that they had not seen a single vehicle come as far as I had tried. A bit after I had gotten the car unstuck, the man came back to make sure that I was okay and helped me to maneuver the car around so that I could face forward again. His kindness helped me to escape that road which I was so grateful for!
He shared with me, a much better way to drive to the trailhead which I learned was the way that everyone else in the area had used. Finally, I could do the short hike to the overlook and I didn’t have to have a tow truck come pull out our rental!

Taken with Sony a7ii and Sony 28mm f2
A favorite town that Katy and I visited was Hardwick, VT. We stopped into a local coffee shop and chatted with the locals who were kind and welcoming. The morning had a mist in the air that caught my eye as the town church steeple created a nice contrast with the moody hillside above. We loved our time in Vermont and will definitely be planning a trip back there during a future year!
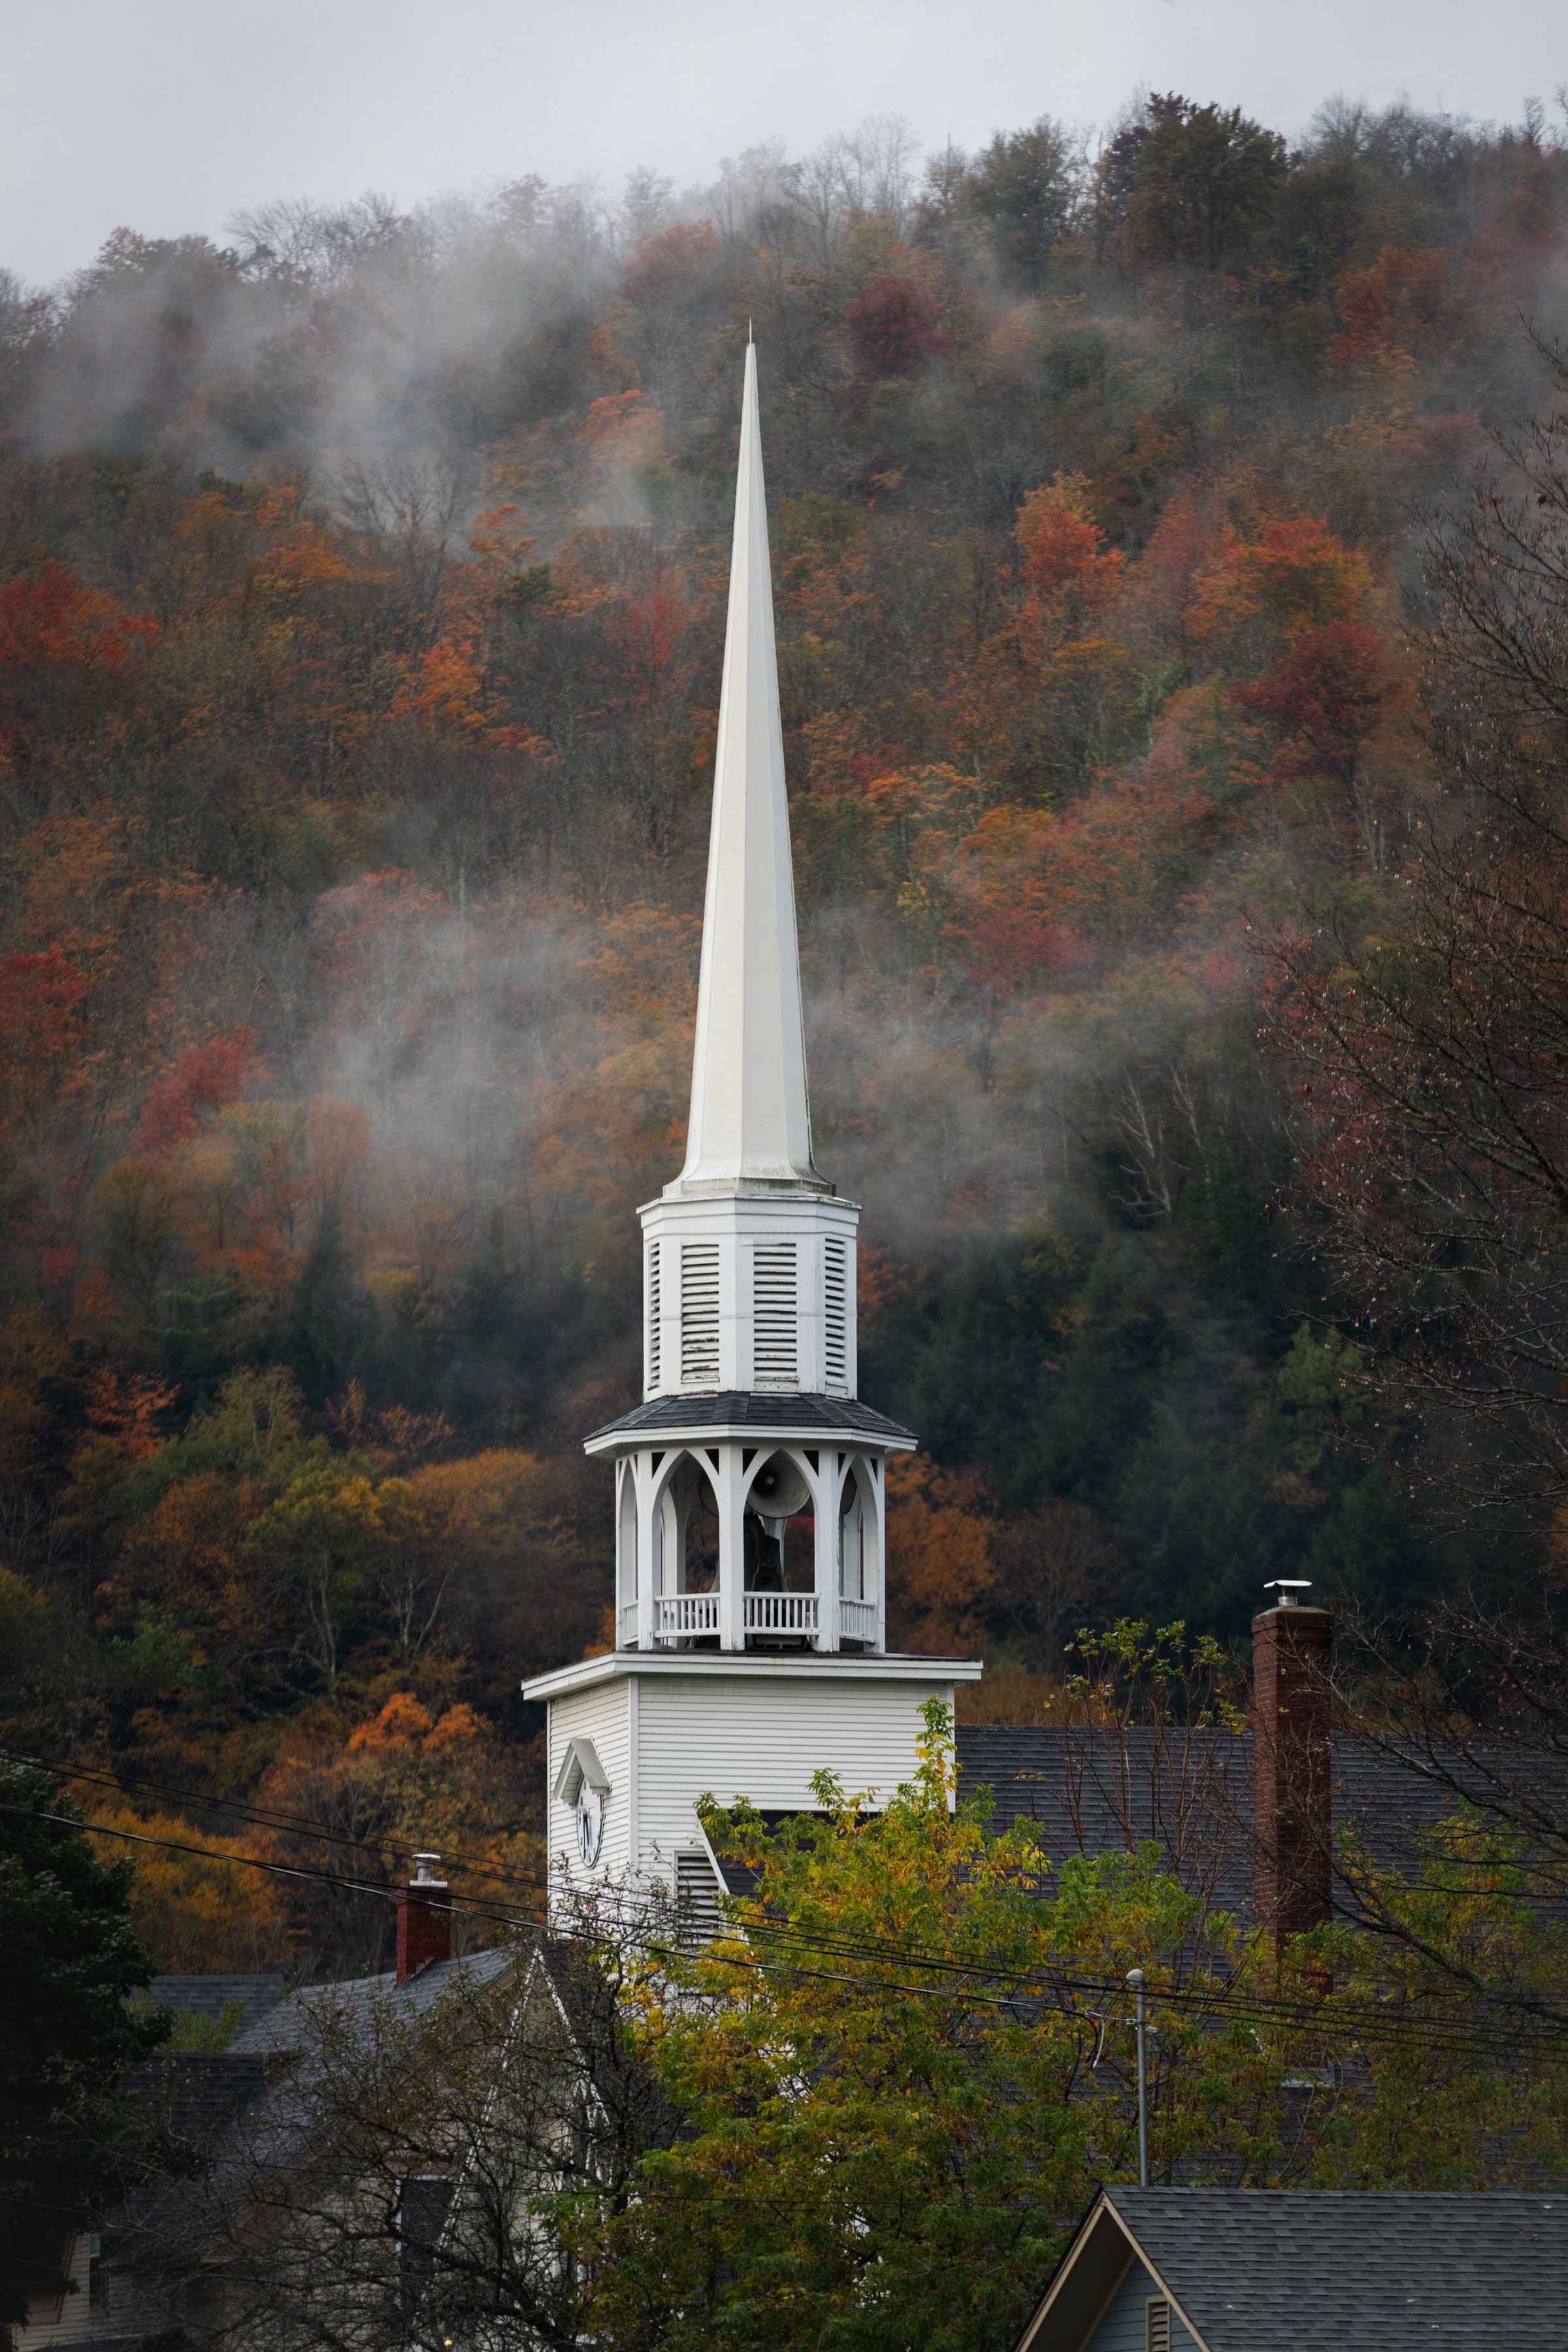
Taken with Sony a7ii and Sony 70-200mm f4